
it’s halloween: crafty & creepy: easy DIY halloween decor
Disclosure: The links below are affiliate links, meaning at no additional cost to you, I may earn a commission if you click through and make a purchase.
Over the years, I’ve discovered that Halloween decorating is less about spending big and more about layering creativity, personal touches, and a little bit of spooky fun. From handmade crafts with my kiddo to front-yard setups that wow the neighbors, these ideas have become part of our family’s Halloween tradition—and they’re easy enough for anyone to recreate.
Outdoor Magic
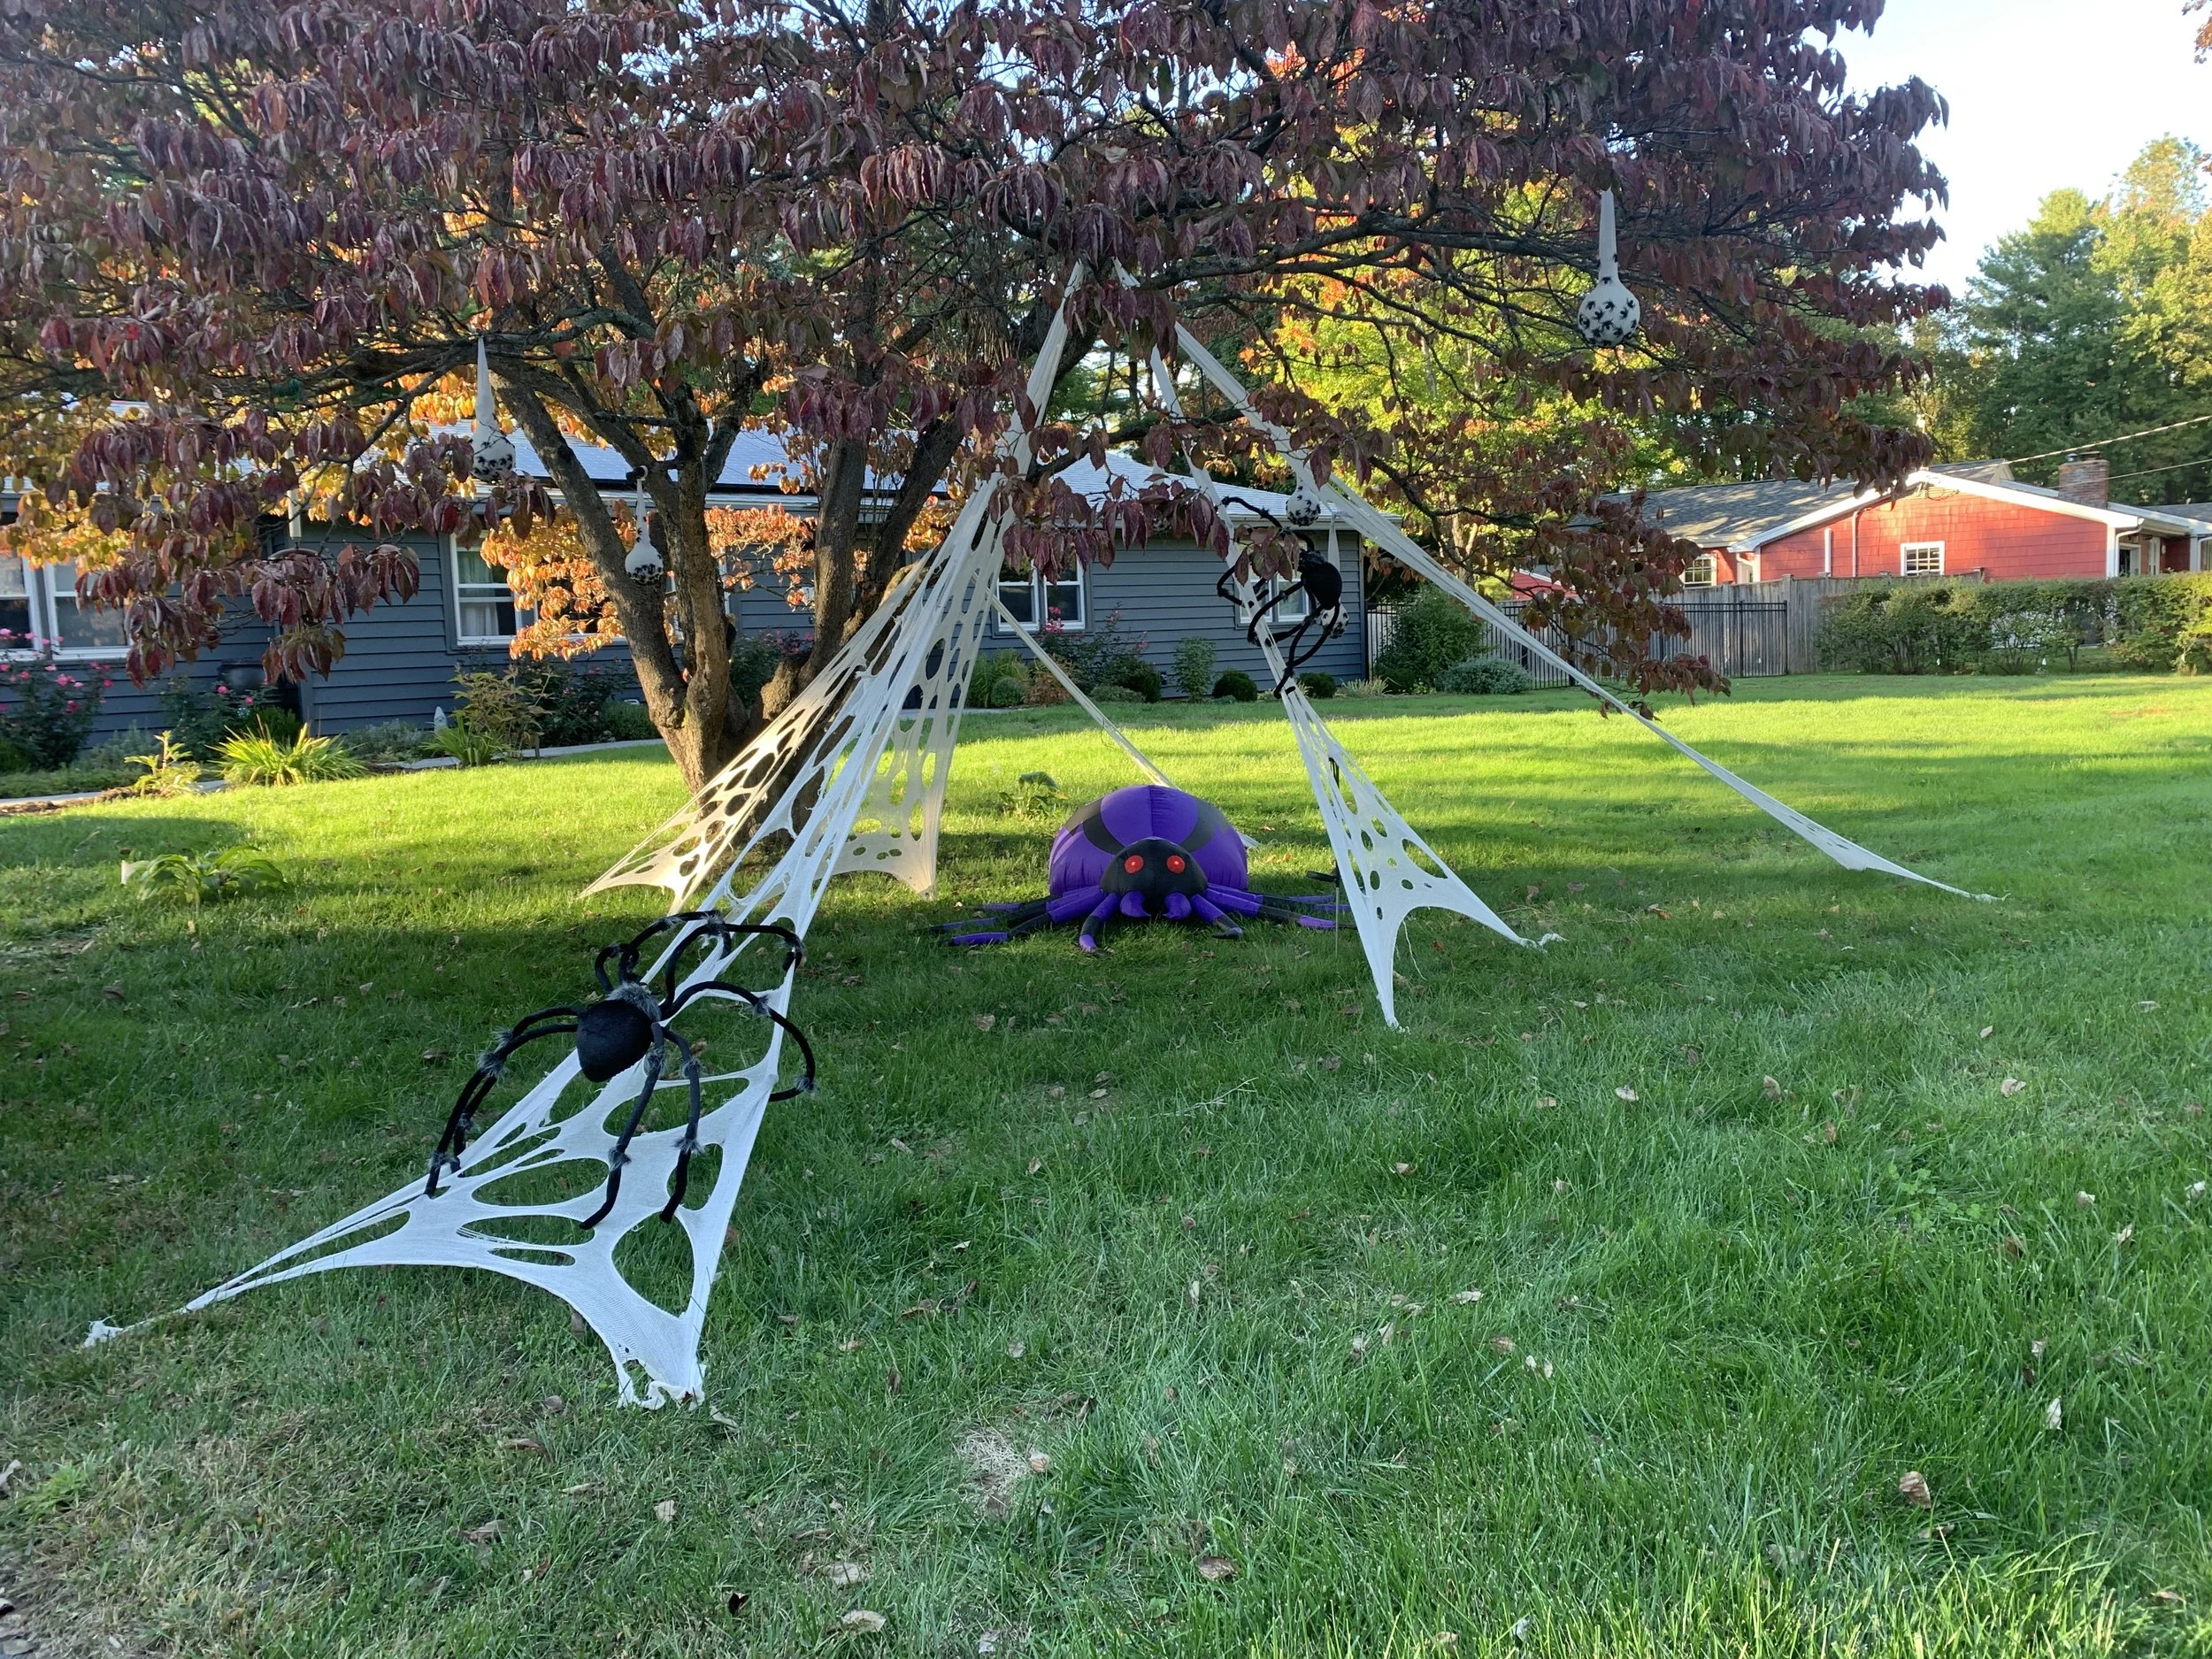
Spiders Everywhere
Years ago we found this amazing beef netting to create the best spiderwebs - they’re reusable year after year AND don’t harm the birds like the ones from the store. We get our poly/cotton netting from Trenton Mills. We bought one five-pound netting and it is plenty to do our front yard. You just stretch it where you want to go and cut holes in it as you go. Trenton Mills has a few great video tutorials too.
In the gallery below, you’ll see we’ve added spider eggs sacs (nylons over a styrofoam ball with plastic spiders) and an inflatable spider, which the kids just love. We even have a projector that shines on the shed with creepy crawly spiders climbing all over it .Eek!
This is super easy, and besides the initial invest in beef netting, it’s relatively inexpensive and you can use it year after year.


Ghostly Graveyard
We have two flowerbeds near the front of our long yard. They look creepy already with all the plants slowly dying back for the season. With the addition of some well-place tombstones and some shepherd hooks to hold Dolores and Zolores, our guazy ghosts, it raises the creepy factor to 11. They are super easy to make and I describe the how=to in the link. We use solar powered flood lights to give them that creepy glow at night. Our biggest issue is keeping the tombstones and bones from blowing away since our house is a wind tunnel in the fall and winter. In years past, we’ve had neighbors half a block away text us to tell us our display is in their front yard. Ha!


Sam
Sam is a character in one of my annual Halloween movie watching traditions - Trick r Treat. He looks like a cute little kid in a orange footie pj’s, but he’s really a scary demon. He creeps me out sitting on our bench in the front yard among the flower beds. Learn more about his construction here and let me know if you want full instructions on how I made him! Just like Dolores and Zolores above, Sam gives me the creeps. I go out at night to take pictures and run in really quickly when I’m done. Eek!


Burning Skeleton
This is a super easy project, if you have an extra pallet lying around. Take the pallet and drape some dollar store spiderweb on top. Get some cheap orange outdoor lights. I prefer ones with a battery pack and a timer so I can set=and-forget. Otherwise I’[ll be going through bags of batteries or having to find another outdoor plug, which during Halloween are being used by the inflatibles, spiders, and projector. Once you get those lights onto the pallet, add some skeleton bones - arms poking out from the depths of hell, or an open mouthed skull as if screaming are all good. You can even lay this one on the ground if you want it to look like the arms are coming from below - scary!
Indoor Halloween Touches
I got volun-told to run the elementary school Halloween Maze last year by the PTO. Someone in the meeting (I was on vacation and not in attendance), said “Lisa and Mike do a job great for Halloween in their yard, they should do it,” or something like this. My friend who was at the meeting texted me at this and I damn near had a heart attack. Not only was this a HUGE amount of work on top of my regular job, taking care of an extremely busy 5th grader, but I was about to go in for emergency wrist surgery to remove what ended up being a benign tumor. Wrist surgery is no joke. Wrist surgery on a person who uses her hands for everything because she’s a wheelchair user is catastrophic. Without my amazing husband’s steadfast support to help with this monumental undertaking, there’s no way I could have pulled it off. He was amazing! I knew I wanted to do it big and there were a few crafts I wanted to tackle to make it the best ever.
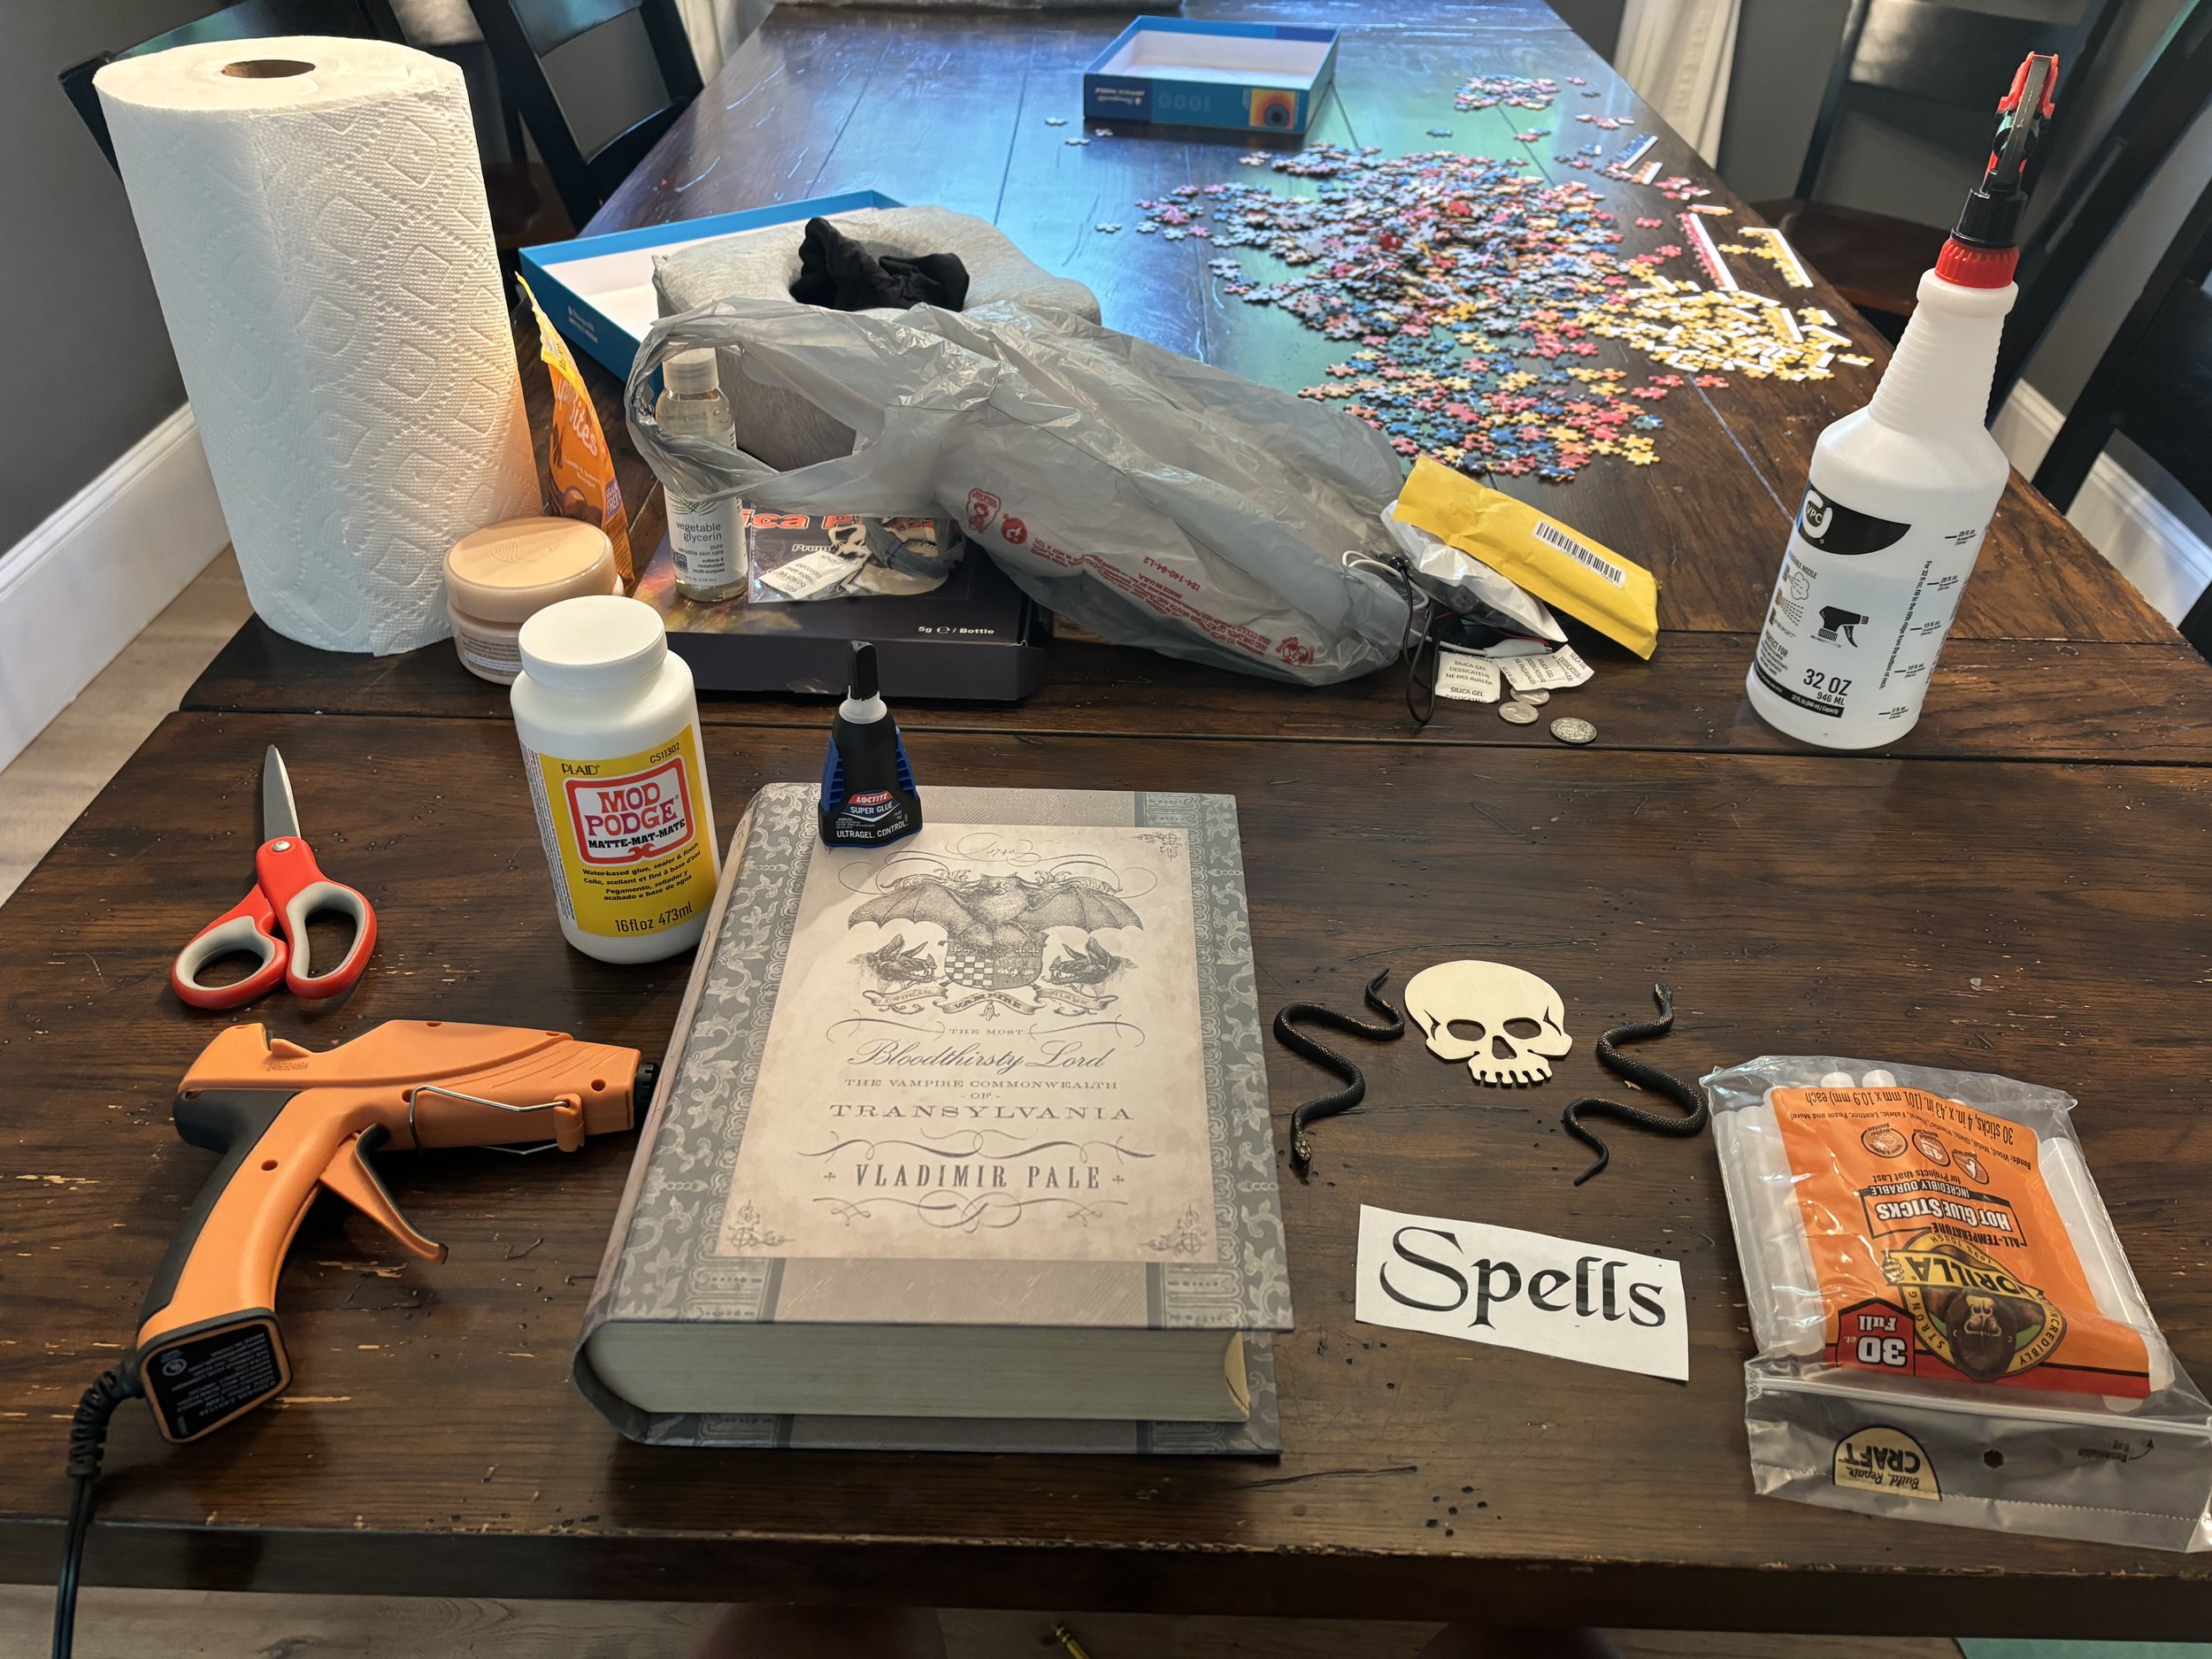
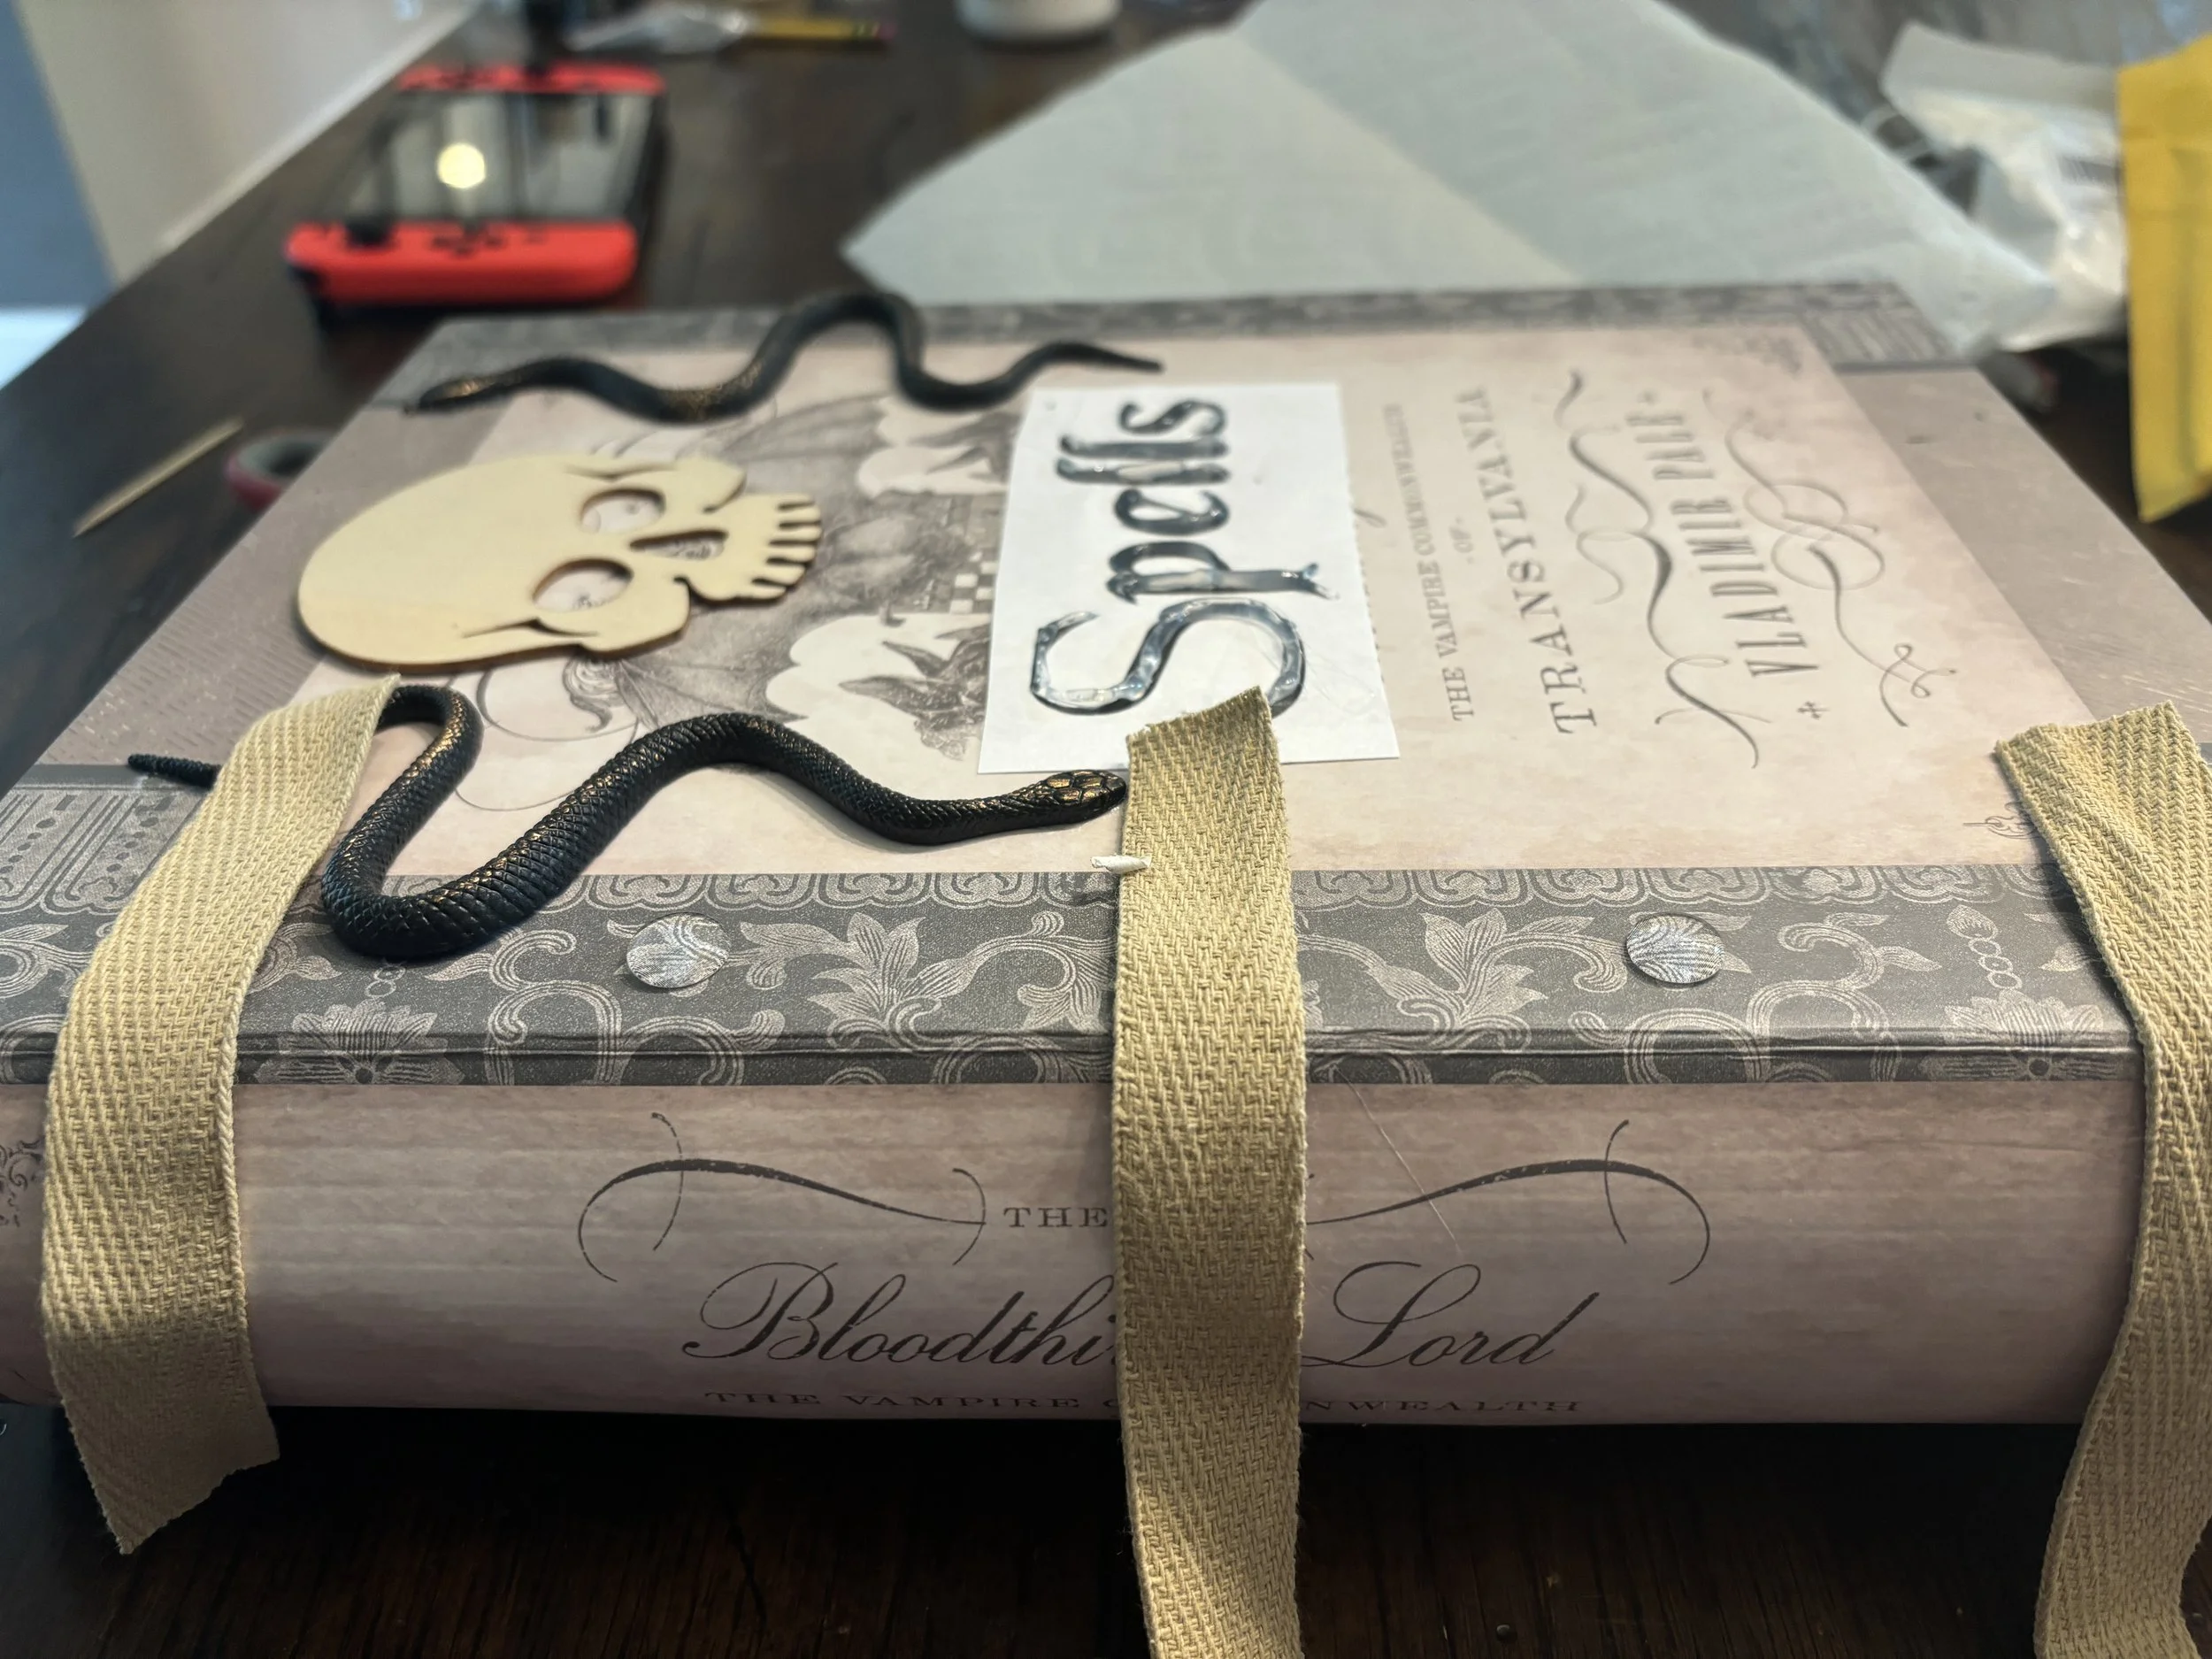
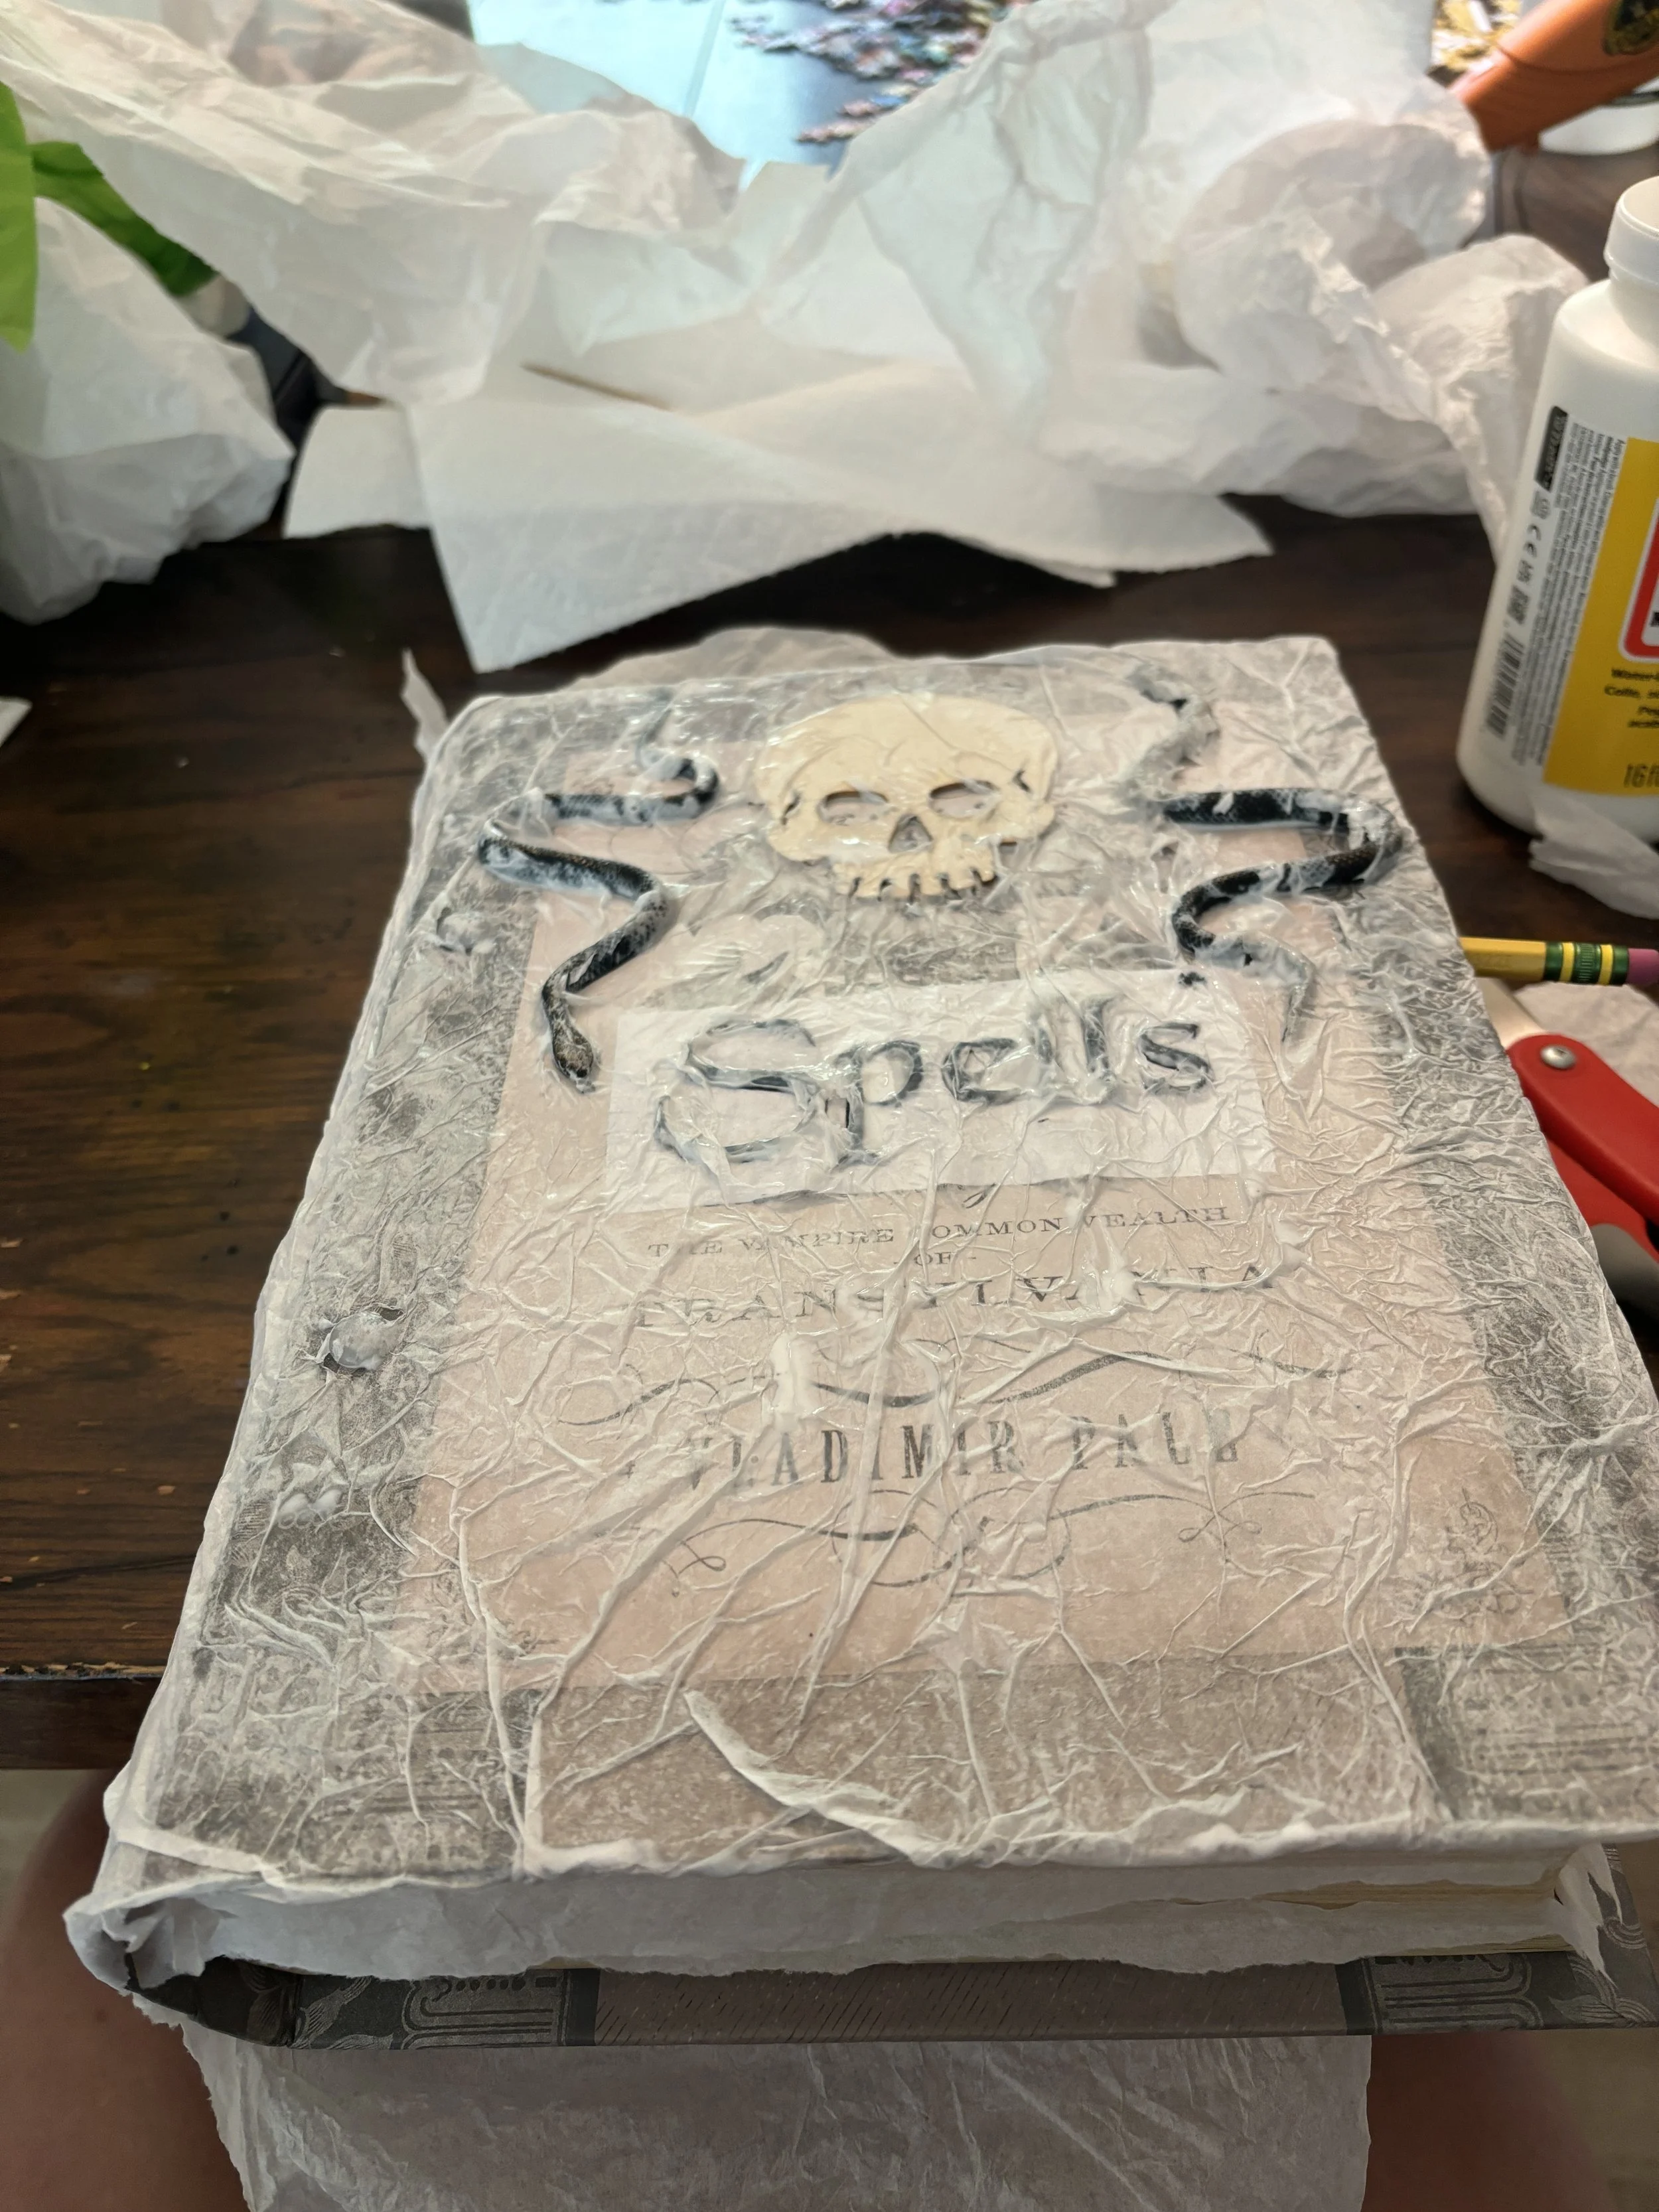
Spellbook
I got the idea for the spellbook and magic potion from Wicked Makers. They have phenomenal Halloween ideas and tutorials, and this was a great one that caught my eye. I had to make it! The hardest part about making this was being patient for the outcome. Waiting between coats of paint is not my strong suit.
I started with a hollow book I found at Michaels, added a motor, the potion bottle - MAGIC. See this video and others on my YouTube channel. Let me know in the comments if you want a full tutorial.


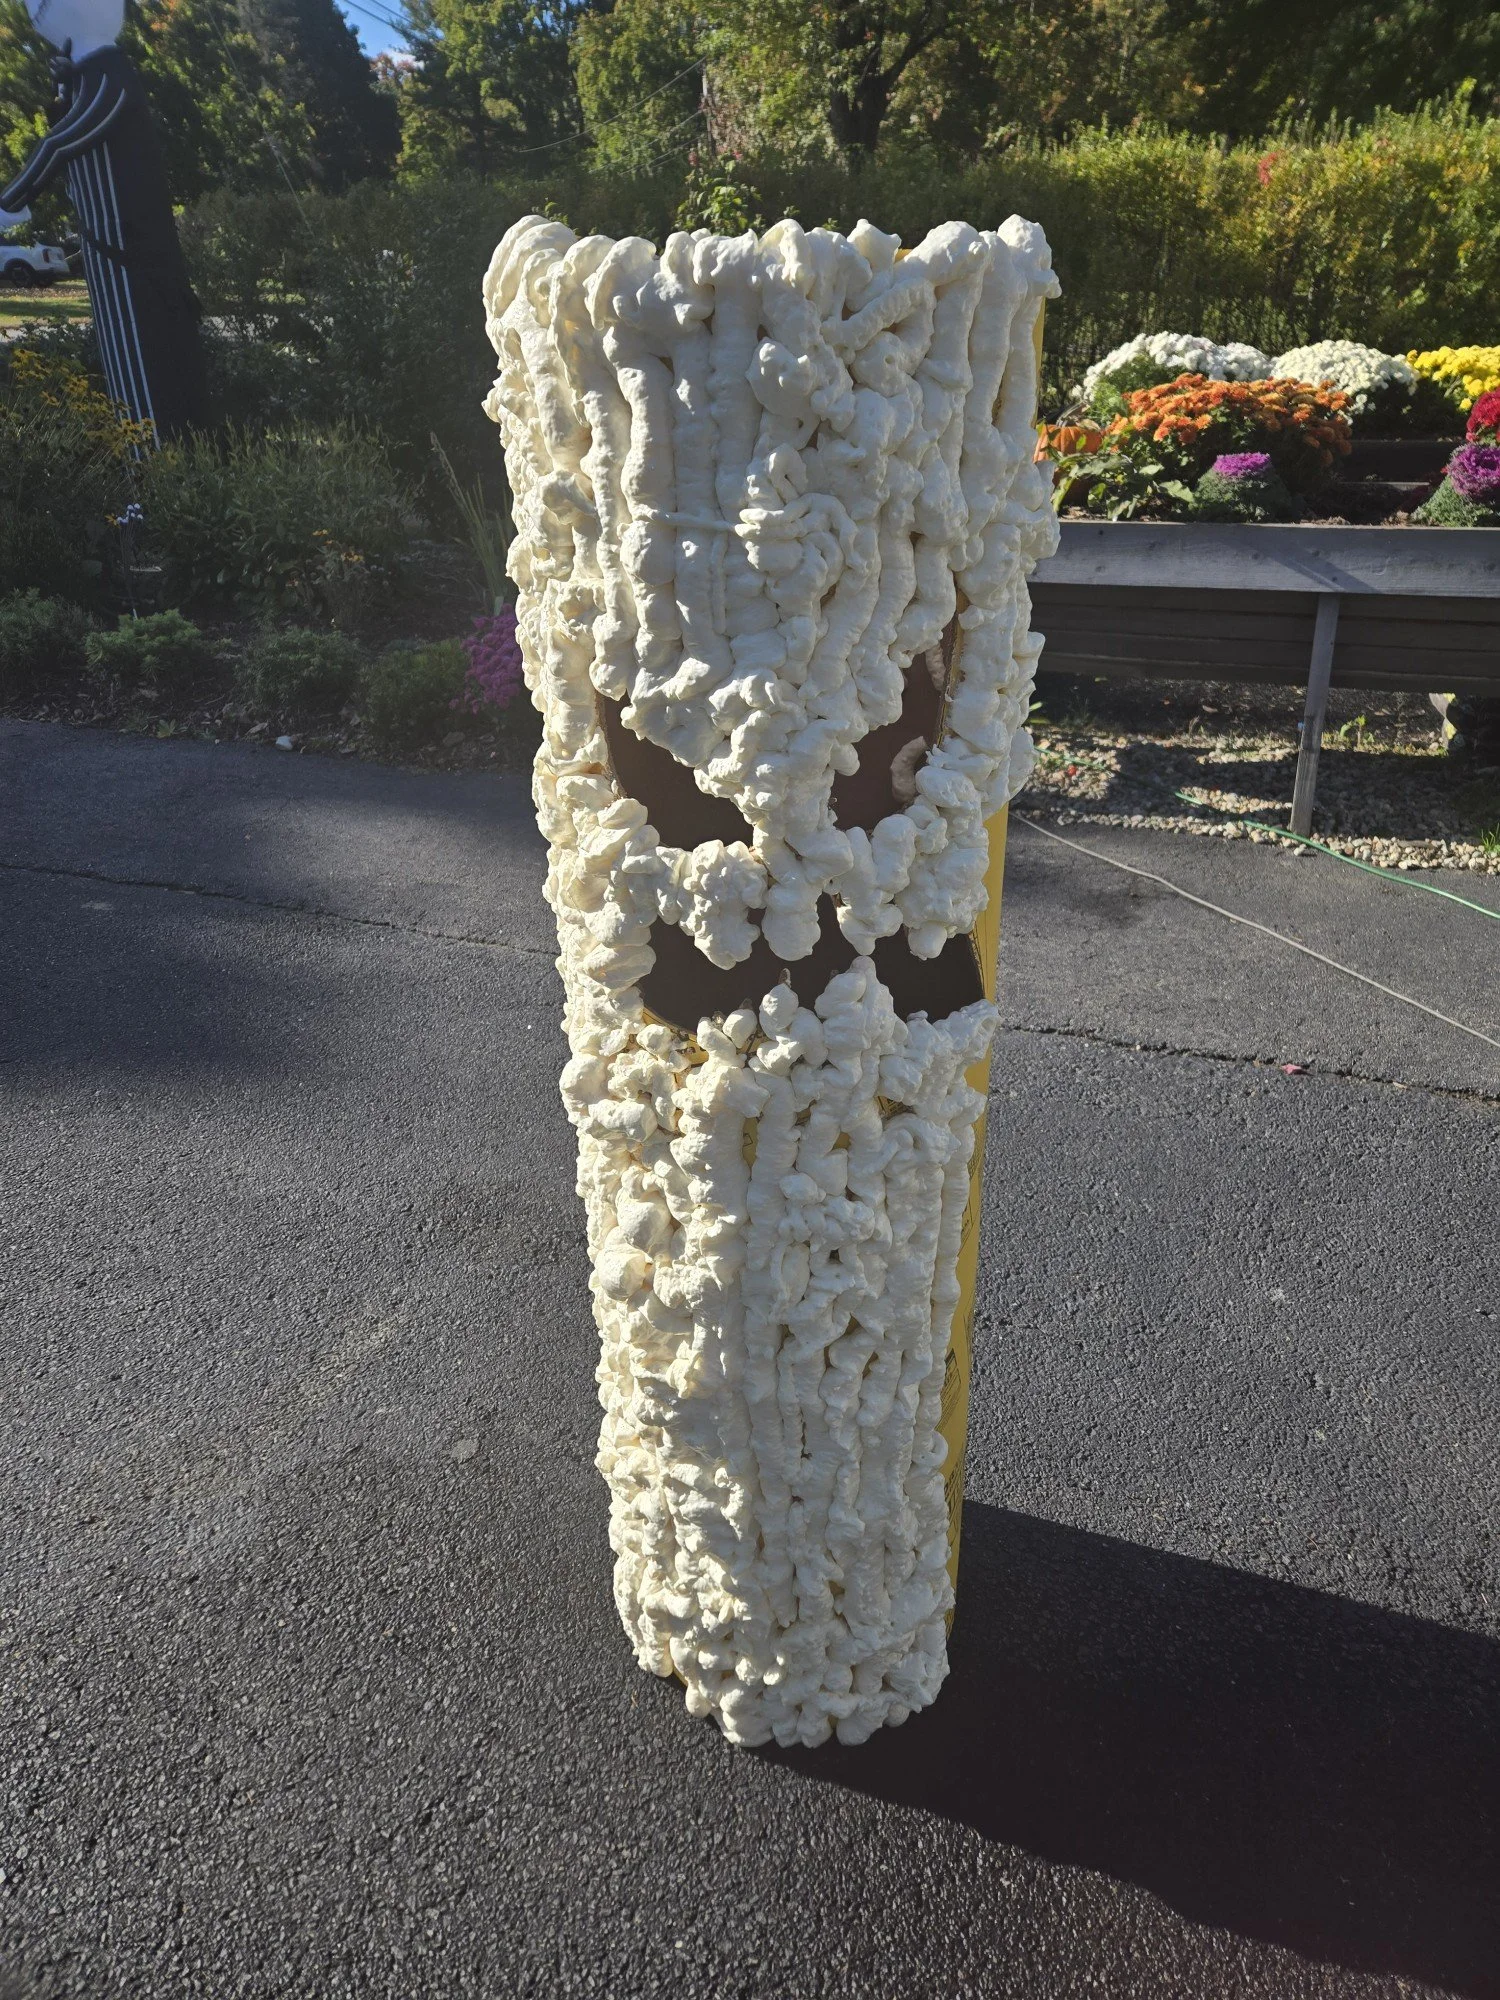
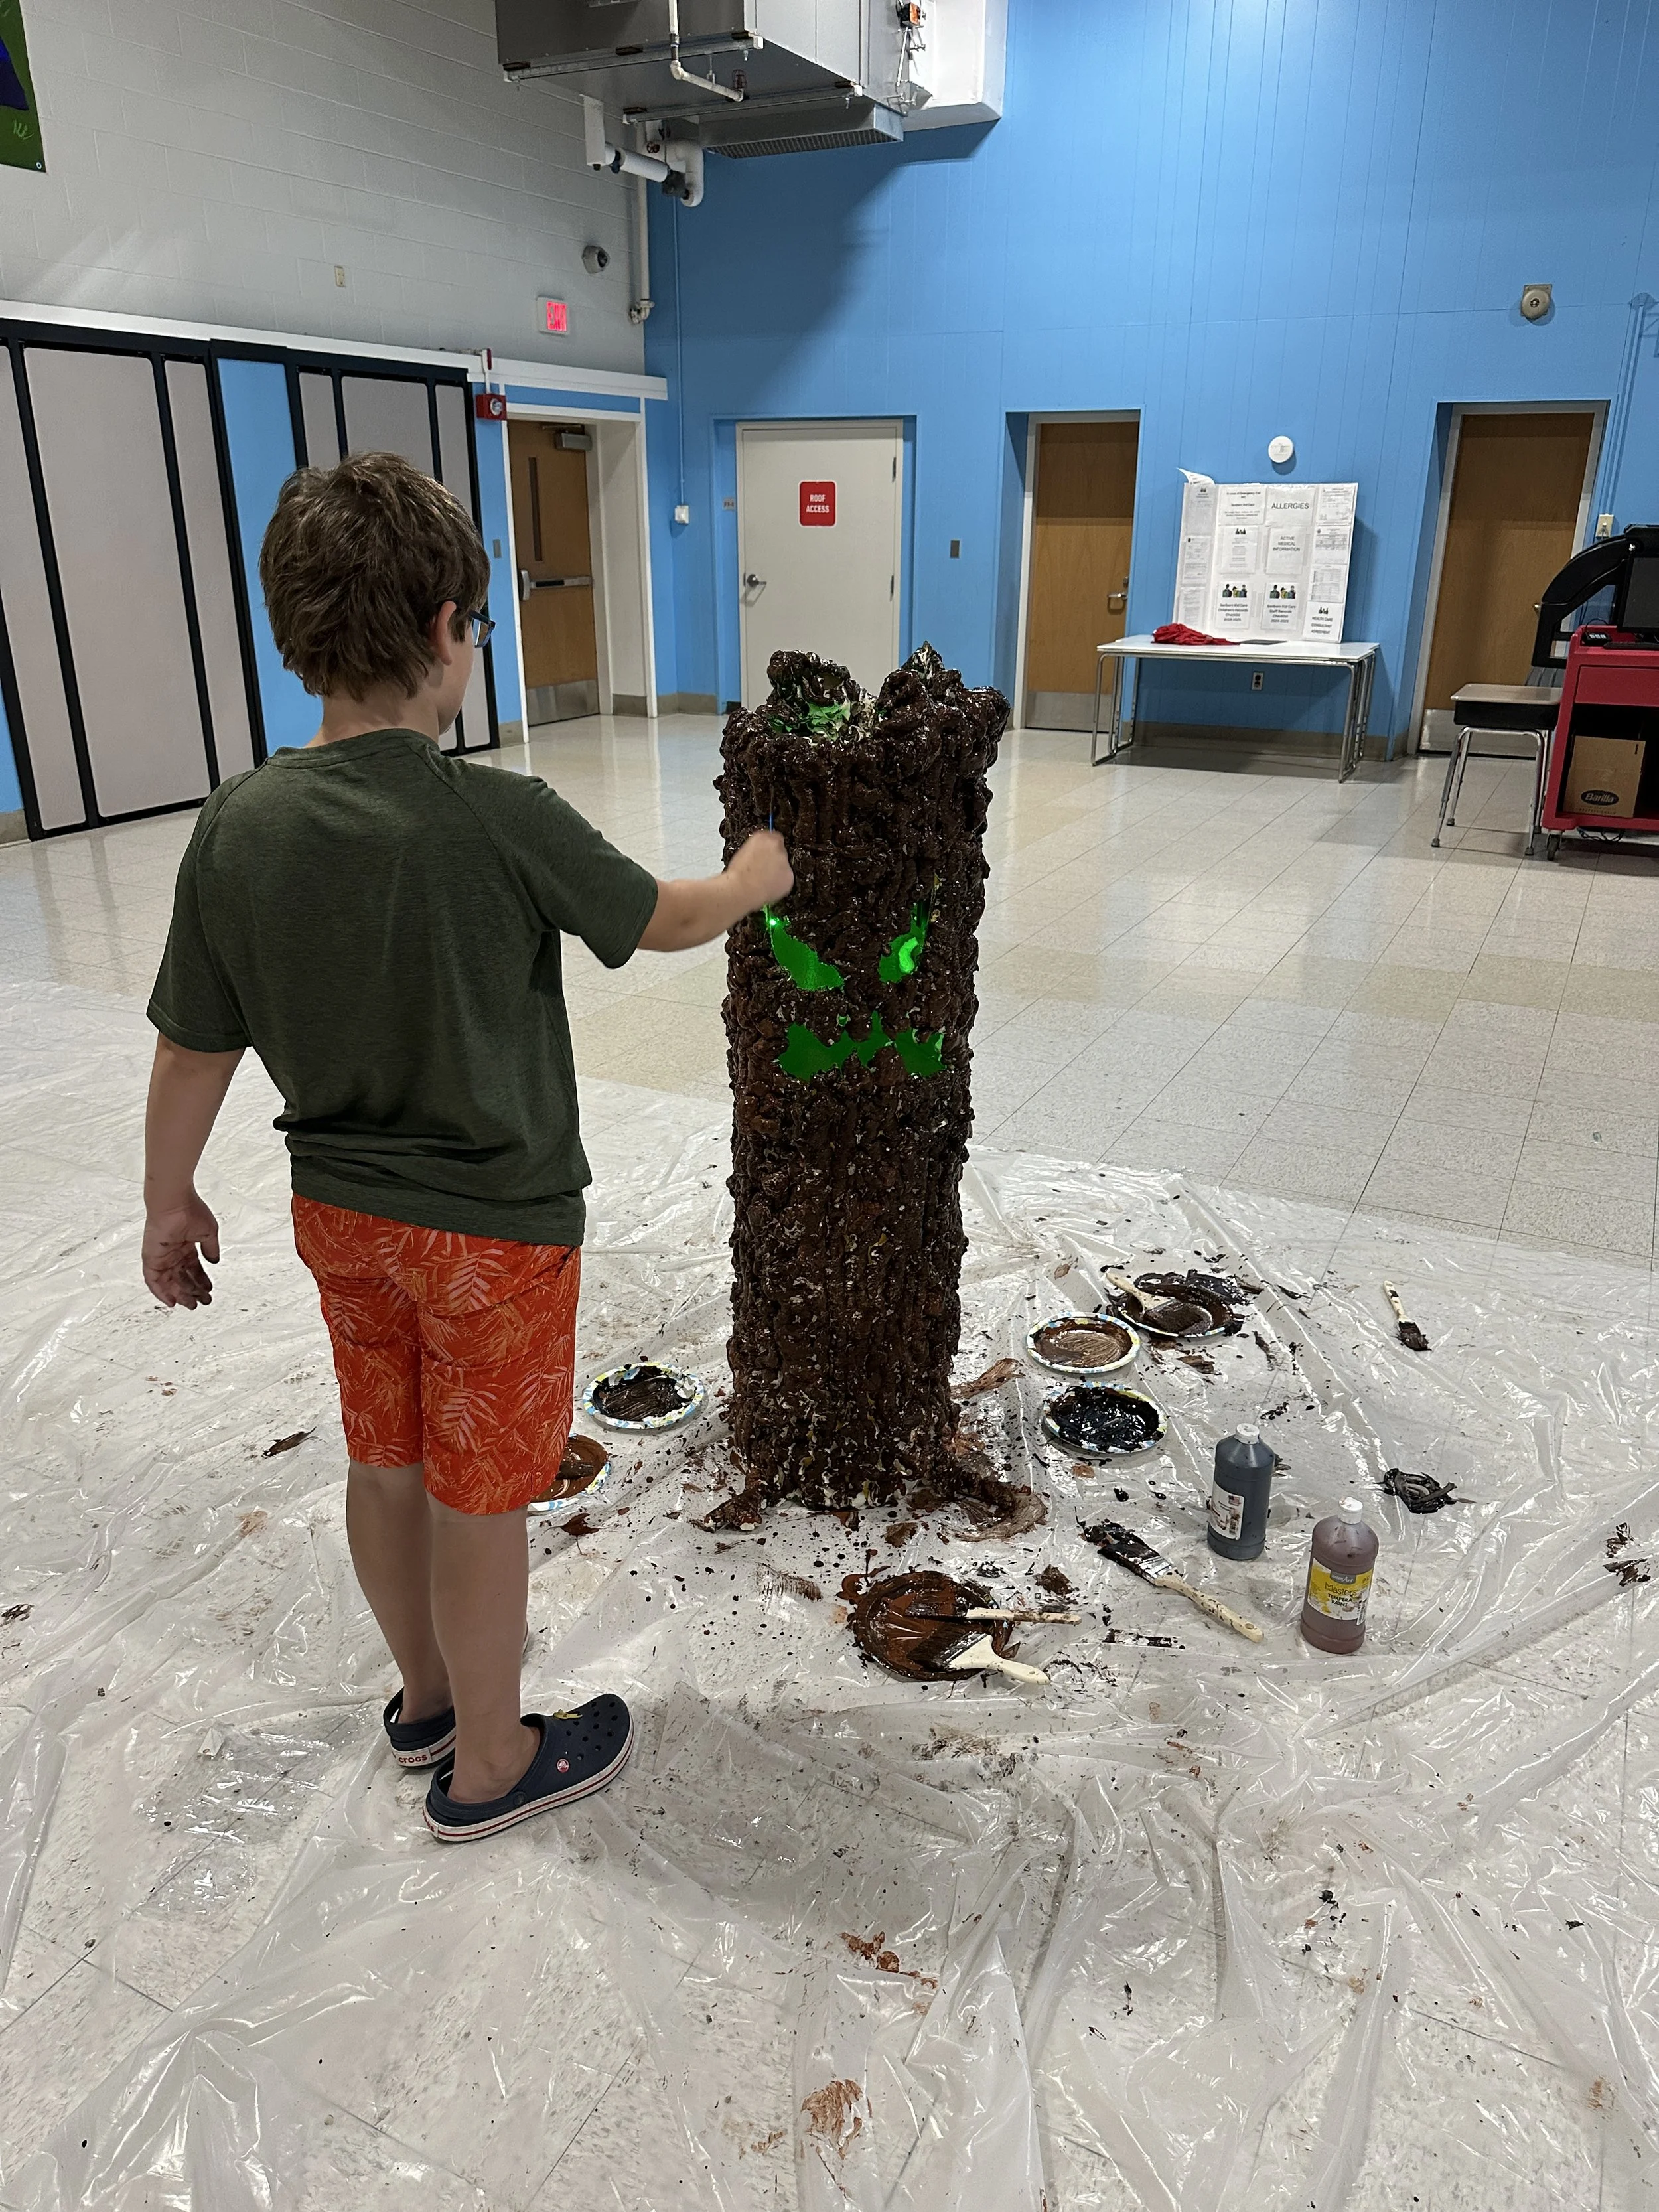
Spooky Tree
Another project I couldn’t wait to make for the Spooky Fun Fair Halloween Maze at the elementary school was this spooky tree. I’d be lying if I said I hadn’t wanted to do this for a few years, but now I had an excuse to do it. One of the maze rooms the 5th graders voted on was Spooky Forest, so this tree became a no-brainer. YAY!
A concrete tube, a jig saw, spray foam (do it laying down and let it dry between coats), some kids to help you paint the outside and your down. I fastented lights to the inside, which was no easy feat because as it turns out the concrete sono tube is slippery by design and I couldn’t use tape. In the end, I used low temp hot glue to get the lights to stick and light up the face from the inisde. I love it! What do you think?


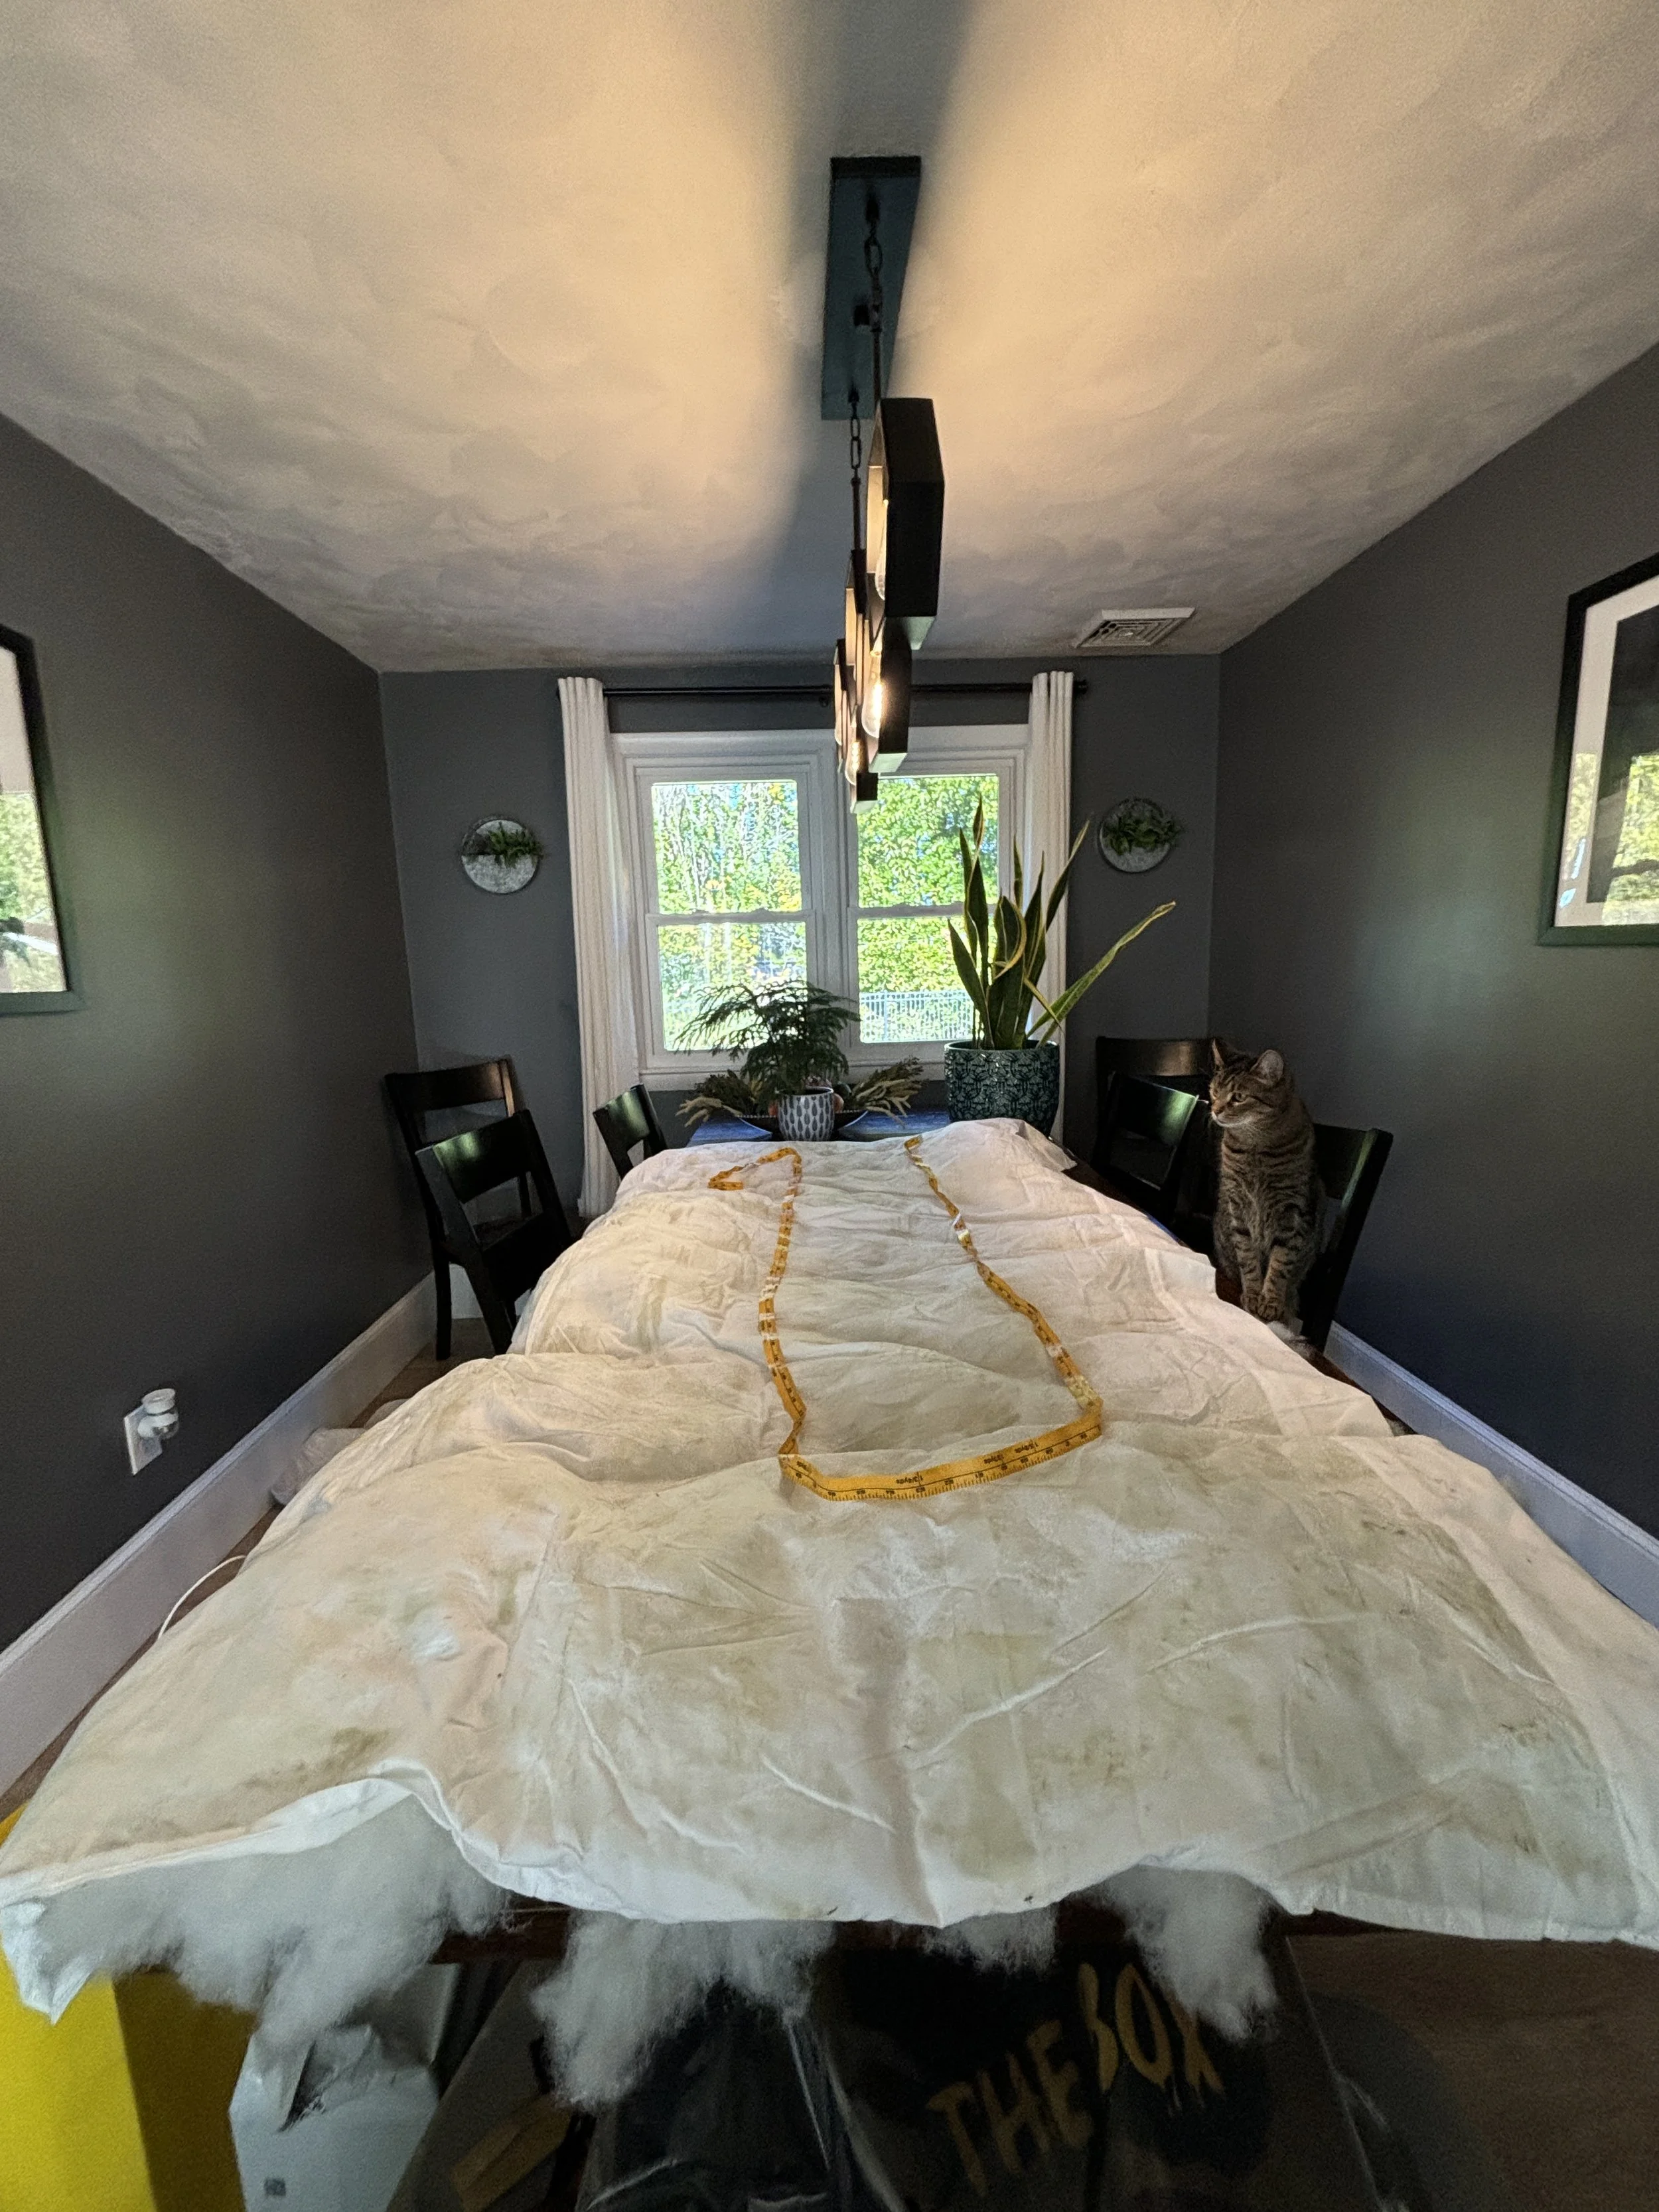
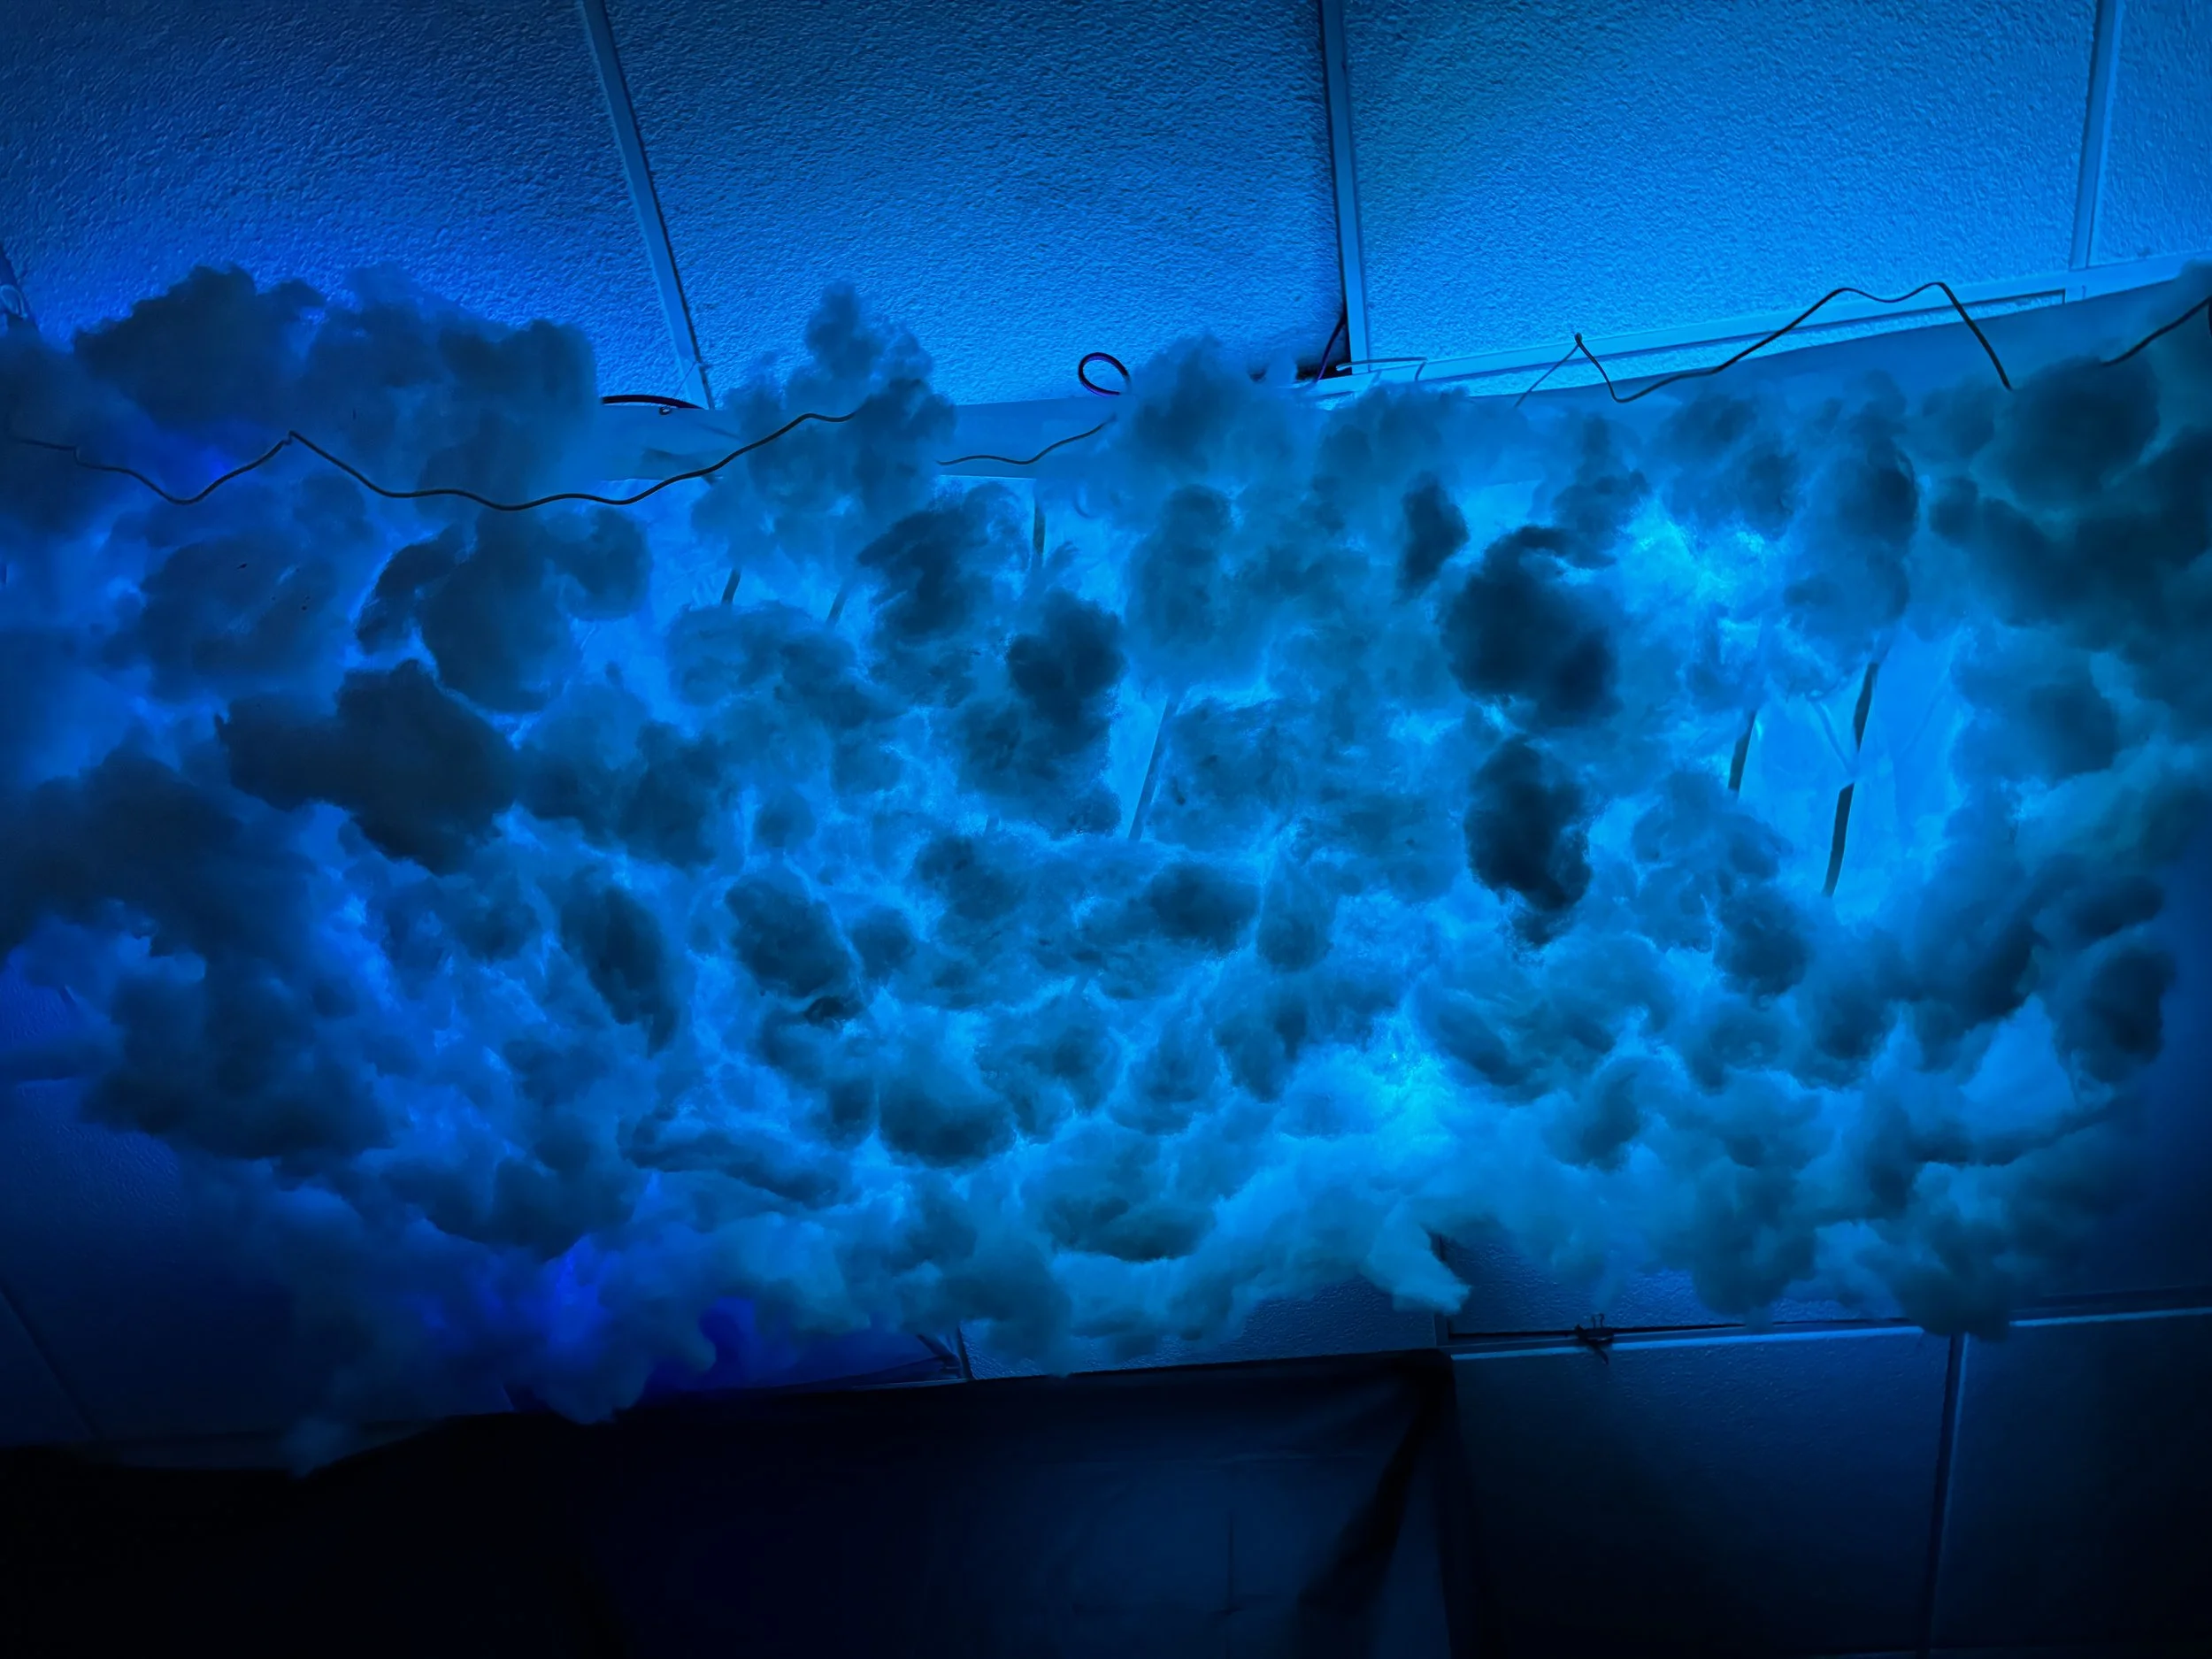
Lightning Cloud
This was another project I saw online and was thankful for the Spooky Fun Fair Halloween Maze to give me an excuse to do it! I took a cheap bedsheet, lots and lots of cotton batting, and spray glue to make the clouds. I used sound activated strip lights and a thunder and lightning video from YouTube to make the lights go off to the sounds of the storm. It looked great in the Halloween Maze as a transition between rooms 1 and 2.

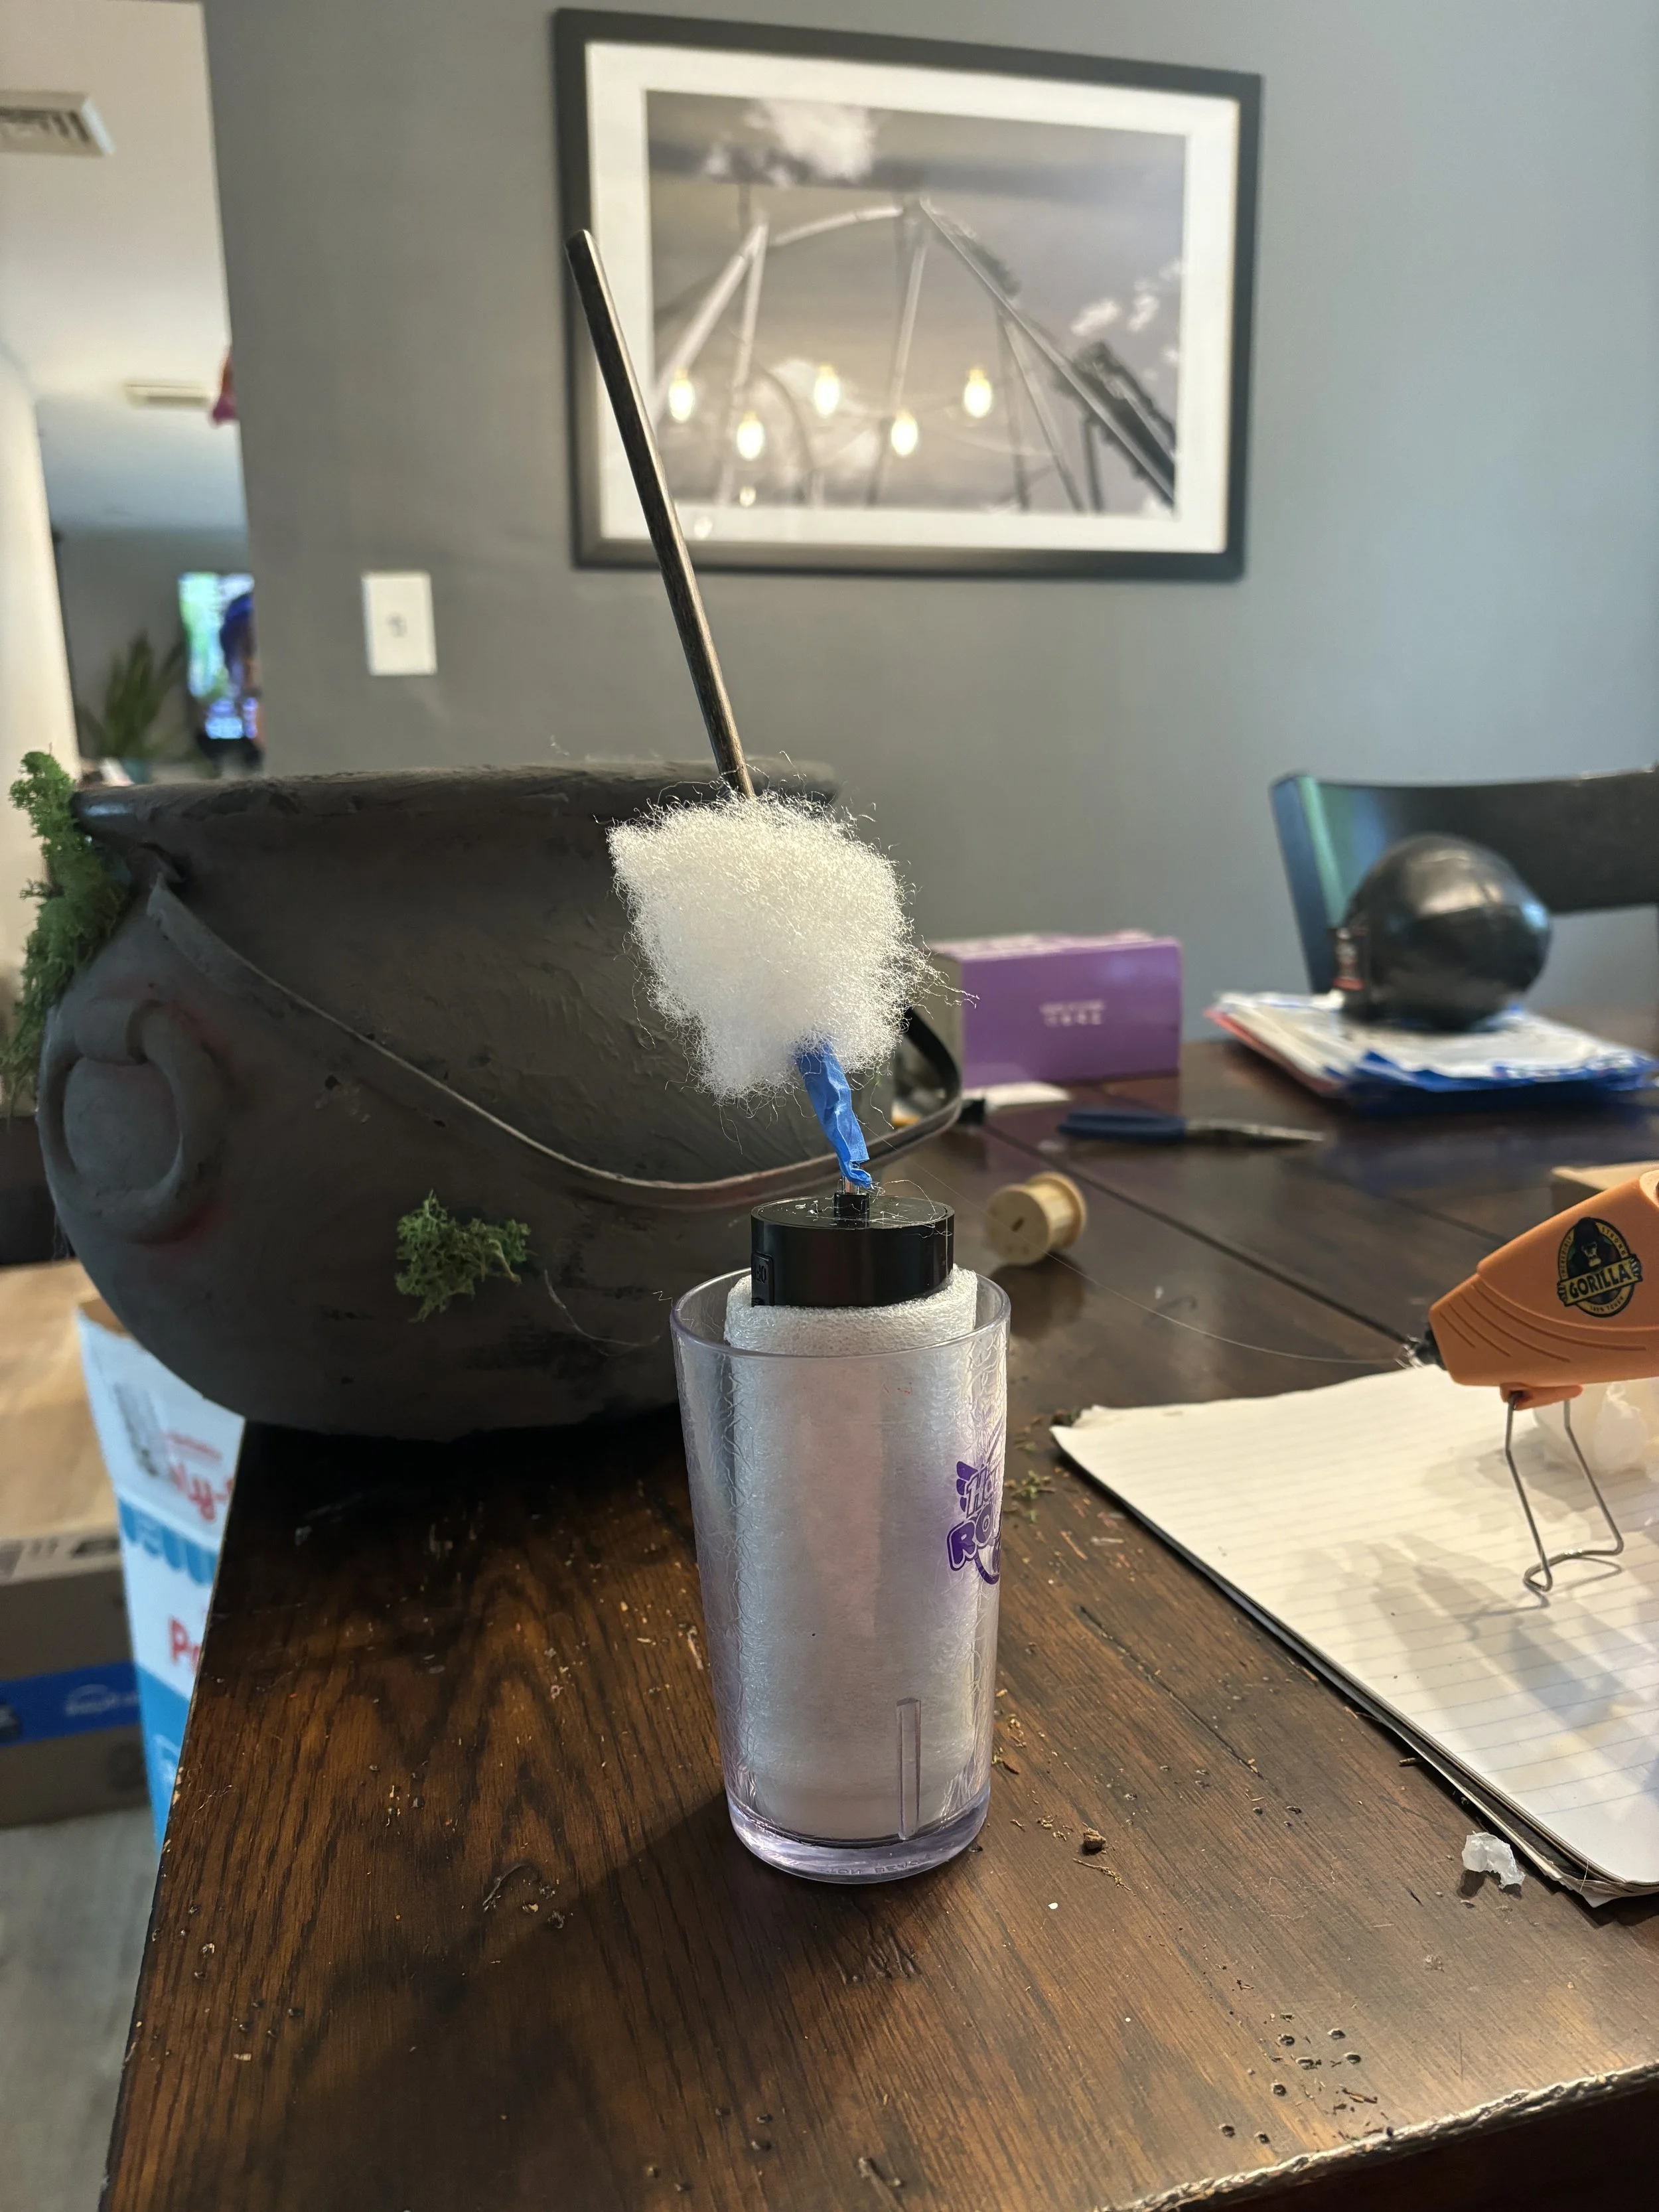
Super Spooky Self-Stirring Witch’s Cauldron
Another great project I saw on Pinterest and made to use in the Halloween Maze. Just another layer of fun thing for the maze particpants to look at and be distracted by so the 5th grade volunteers could jump out of the dark and scare you! The hardest part about this craft was getting a “spoon” that wasn’t so heavy that it leaned over onto the cauldron, which made it difficult for the disco-ball motor I was using, to turn in the pot. Pinterest had a great tutorial here.


Harry Potter Directional Sign
This project was a labor of love and patience. I love Harry Potter but I have no patience, so this was a hard project for me. I also wished I had a Cricut about a million times over this project because all the lettering was done by hand. In the pictures below, you can see the final outside. However, even though it has a coat of poly, I would not leave it outside. I bought the unfinished wood sign years ago at Michaels but knew this was going to be a time intensive project so I waited until last year - when I was insanely busy with the Halloween Maze - to do it. Makes perfect sense, right?


Neighborhood & Community Fun
Halloween changed post-COVID. There were so much negative out of the pandemic, but a positive outcome was neighborhood Halloween trick or treat block parties. A group of us all sit outside at the end of driveways, handing out candy, decorating our tables, and chatting with neighbors on Halloween night. It’s lovely. Every year, our pumpkins and other DIY decorations are on full display for Halloween.


For more ideas on Trunk or Treat, visit: it’s halloween - trunk or treat